
Homemade Halloween cookies are the easiest way to make October feel special. They work for class parties, trick-or-treat gatherings, family baking nights, or a cozy afternoon with a cup of cocoa.
This list of easy Halloween cookies has something for every skill level. Some use homemade dough, some use store-bought shortcuts, and one needs no baking at all. Pick a few, grab the sprinkles, and have fun.

Quick Overview
Times and yields are estimates. They vary with your oven, cookie size, and decorating speed.
- Prep time: 15–30 minutes per recipe (plus 30–60 minutes chilling for most homemade dough)
- Baking time: 8–12 minutes per tray
- Total time: About 1 to 2 hours, including chilling and decorating
- Difficulty: Easy to Medium
- Yield: About 12–24 cookies per recipe
10 Halloween Cookie Recipes
Before You Start: Base Sugar Cookie Dough and Simple Icing
Five of the recipes below build on this dough, so you only need to read it once.
Base Sugar Cookie Dough (homemade, makes about 24 cookies)
- 3 cups all-purpose flour
- 1 teaspoon baking powder
- ½ teaspoon salt
- 1 cup (2 sticks) unsalted butter, softened
- 1 cup granulated sugar
- 1 large egg
- 2 teaspoons vanilla extract
Steps:
- Whisk the flour, baking powder, and salt together.
- Beat the butter and sugar for about 2 minutes until creamy. Beat in the egg and vanilla.
- Add the flour mixture and mix on low until a soft dough forms.
- Divide the dough into two discs, wrap them, and chill for at least 1 hour (up to 2 days).
- Roll to ¼-inch thick on a lightly floured surface, cut shapes, and place them 1 inch apart on parchment-lined baking sheets.
- Bake at 350°F for 8–10 minutes, until the edges just turn pale golden. Cool 5 minutes on the tray, then move to a wire rack.
Simple Icing (enough for about 24 cookies)
- 2 cups powdered sugar
- 3 tablespoons milk (add more ½ teaspoon at a time if needed)
- ½ teaspoon vanilla extract
- Gel food coloring (optional)
Whisk until smooth and thick but spreadable. Make it a little thicker for piping details.
1. Classic Halloween Sugar Cookies
Type: Homemade dough | Prep: 25 min + 1 hr chilling | Bake: 8–10 min | Makes: about 24
A soft, buttery sugar cookie in spooky shapes with a sprinkle-covered glaze. It’s the best starting point for beginners, and kids can decorate their own.
Why you’ll love it: The dough is forgiving, and the decorating is totally up to you.
Main ingredients: Base Sugar Cookie Dough, Simple Icing, Halloween sprinkles
Steps:
- Make and bake the Base Sugar Cookie Dough using Halloween cutters (or a drinking glass for circles).
- Cool the cookies completely.
- Spread icing on each cookie and add sprinkles before the icing sets.
Tip: Tint your icing orange, purple, and green for a classic Halloween palette.

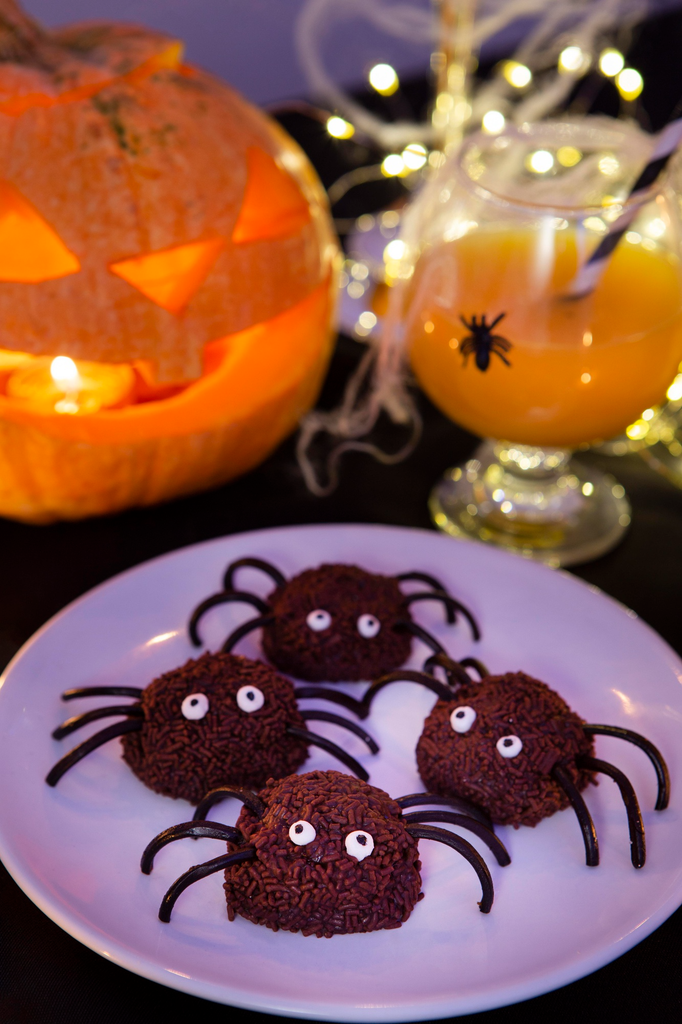
2. Chocolate Spider Cookies
Type: Homemade dough | Prep: 20 min + 20 min chilling | Bake: 9–10 min | Makes: about 20
Soft chocolate cookies topped with a candy “body,” candy eyes, and piped legs.
Why you’ll love it: They look impressive but only need basic decorating.
Main ingredients:
- ½ cup (1 stick) butter, softened
- ¾ cup granulated sugar
- 1 large egg
- 1 teaspoon vanilla extract
- 1 cup all-purpose flour
- ⅓ cup unsweetened cocoa powder
- ½ teaspoon baking soda
- ¼ teaspoon salt
- Mini peanut butter cups, candy eyes, black decorating gel
Steps:
- Beat the butter and sugar until creamy, then beat in the egg and vanilla.
- Mix in the flour, cocoa, baking soda, and salt. Chill 20 minutes.
- Roll into 1-tablespoon balls and place 2 inches apart on a parchment-lined tray.
- Bake at 350°F for 9–10 minutes.
- Right after baking, gently press an unwrapped mini peanut butter cup into the center of each cookie.
- Once cooled, use black gel to draw four legs on each side and attach two candy eyes.
Tip/Variation: For a nut-free version, use a round peanut-free chocolate candy as the body.
3. Pumpkin-Shaped Sugar Cookies
Type: Homemade dough | Prep: 30 min + 1 hr chilling | Bake: 8–10 min | Makes: about 24
Orange-tinted sugar cookies cut into pumpkins and finished with green stems.
Why you’ll love it: They look just like mini pumpkins, and a single cutter does all the work.
Main ingredients: Base Sugar Cookie Dough, orange gel food coloring (about ½ teaspoon), Simple Icing tinted green, pumpkin cookie cutter
Steps:
- Make the dough through step 3, then mix in the orange gel color until evenly tinted.
- Chill, roll, cut with a pumpkin cutter, and bake at 350°F for 8–10 minutes.
- Cool completely.
- Pipe a green icing stem and a small curl on each pumpkin. Add curved lines with a toothpick dipped in icing or gel if you like.
Tip: If you’d rather skip tinting the dough, leave it plain and cover the pumpkins with orange icing instead.

4. Halloween Sprinkle Cookies
Type: Store-bought shortcut | Prep: 10 min | Bake: 10–12 min | Makes: about 20
Chewy, colorful cookies with no rolling and no decorating.
Why you’ll love it: They’re the fastest recipe on the list, and a good one for little helpers.
Main ingredients:
- 1 package (about 16 oz) refrigerated sugar cookie dough
- ⅓ cup Halloween sprinkles, plus extra for topping
Steps:
- Let the dough soften slightly, then knead in the sprinkles by hand.
- Roll into balls (about 1½ tablespoons each) and place 2 inches apart on a parchment-lined tray.
- Press a few extra sprinkles on top.
- Bake according to the package, usually around 350°F for 10–12 minutes.
Tip: Rod-shaped sprinkles (jimmies) hold their color better than tiny round nonpareils, which can bleed into the dough.

5. Mummy Cookies with White Chocolate Drizzle
Type: Homemade dough | Prep: 30 min + 1 hr chilling | Bake: 8–10 min | Makes: about 24
Sugar cookies “wrapped” in white chocolate bandages with peeking candy eyes.
Why you’ll love it: The drizzle is meant to look messy, so there’s no pressure to be neat.
Main ingredients: Base Sugar Cookie Dough, 1 cup white chocolate chips, 1 teaspoon vegetable or coconut oil, candy eyes
Steps:
- Cut the dough into rectangles or gingerbread-man shapes, then bake at 350°F for 8–10 minutes. Cool completely.
- Melt the white chocolate chips and oil in the microwave in 20-second bursts, stirring each time, until smooth.
- Place two candy eyes on each cookie, using a dab of melted chocolate to stick them.
- Drizzle zigzag lines across each cookie with a spoon or a zip-top bag with the corner snipped. Let it set.
Tip: Drizzle in a crisscross pattern and leave a small gap for the eyes to peek through.

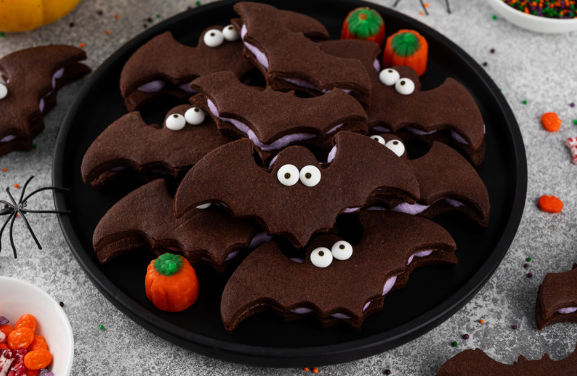
6. Chocolate Bat Cookies
Type: Homemade dough | Prep: 30 min + 1 hr chilling | Bake: 8–10 min | Makes: about 24
Dark chocolate cut-out cookies shaped like bats, with simple white icing eyes and fangs.
Why you’ll love it: Dark cookies with white details really pop on a party tray.
Main ingredients: Base Sugar Cookie Dough with one change (use 2½ cups flour plus ½ cup unsweetened cocoa powder instead of 3 cups flour), a bat cookie cutter, white Simple Icing
Steps:
- Make the dough with the cocoa swap. Chill, roll, and cut out bat shapes.
- Bake at 350°F for 8–10 minutes. The edges should look set, with no shiny wet spots.
- Cool completely.
- Use thick white icing in a zip-top bag to pipe two eyes and two tiny fangs on each bat.
Tip: No bat cutter? Trace a paper bat template with a small knife.
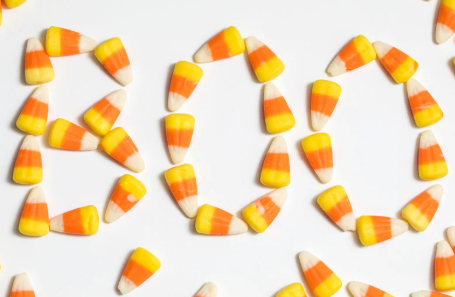
7. Candy Corn Cookies
Type: Homemade dough | Prep: 30 min + 1 hr chilling | Bake: 8–10 min | Makes: about 24
Triangle-shaped sugar cookies finished with yellow, orange, and white stripes.
Why you’ll love it: The classic candy corn look, without the candy.
Main ingredients: Base Sugar Cookie Dough, Simple Icing in yellow, orange, and white
Steps:
- Roll the chilled dough to ¼-inch thick. Cut into triangles about 2½ inches tall with a knife or small triangle cutter, and soften the corners with a fingertip.
- Bake at 350°F for 8–10 minutes and cool completely.
- Ice the wide base yellow, the middle orange, and the tip white. Let each color set for a few minutes before adding the next.
Tip: Use a toothpick to nudge icing into the corners for clean stripes.
8. Ghost-Shaped Cookies (No-Bake)
Type: Store-bought shortcut, no baking | Prep: 25 min + 30 min setting | Bake: None | Makes: about 12–16
Peanut butter sandwich cookies dipped in white chocolate to look like little ghosts.
Why you’ll love it: The oval cookie shape already looks like a ghost, and you don’t need an oven.
Main ingredients:
- 12–16 peanut butter sandwich cookies (like Nutter Butters)
- 2 cups white chocolate chips
- 1 tablespoon coconut oil or vegetable shortening
- Mini chocolate chips or black gel for eyes and mouths
Steps:
- Melt the white chocolate chips and oil in 20-second microwave bursts, stirring until smooth.
- Dip each cookie in the chocolate, tap off the excess, and set it on parchment paper.
- Add two mini chocolate chips for eyes (pointy side up) and a small mouth with black gel before the coating sets.
- Let them set about 30 minutes at room temperature.
Tip/Variation: For a nut-free option, bake ghost-shaped cut-outs from the Base Sugar Cookie Dough and cover them with white icing.

9. Black-and-Orange Chocolate Chip Cookies
Type: Homemade dough | Prep: 15 min | Bake: 10–12 min | Makes: about 24
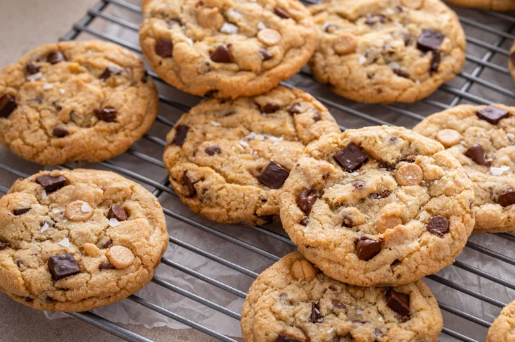
Classic chocolate chip cookies with orange and black candy pieces for a Halloween look.
Why you’ll love it: They’re soft, chewy, and fast, because there’s no chilling or decorating.
Main ingredients:
- 2 cups all-purpose flour
- 1 teaspoon baking soda
- ½ teaspoon salt
- ¾ cup (1½ sticks) butter, softened
- ¾ cup packed brown sugar
- ½ cup granulated sugar
- 1 large egg plus 1 egg yolk
- 2 teaspoons vanilla extract
- 1 cup semi-sweet chocolate chips
- ¾ cup orange and black candy-coated chocolate pieces
Steps:
- Whisk the flour, baking soda, and salt.
- Beat the butter and both sugars until creamy. Mix in the egg, yolk, and vanilla.
- Stir in the flour mixture, then fold in the chocolate chips and half of the candy pieces.
- Scoop 2-tablespoon balls onto a parchment-lined tray, 2 inches apart.
- Bake at 350°F for 10–12 minutes, until the edges are golden and the centers look just set.
- Press the remaining candy pieces on top while the cookies are still warm.
Tip: Pressing candy on top after baking keeps the colors bright instead of melted.
10. Monster Eye Cookies
Type: Store-bought shortcut | Prep: 15 min | Bake: 10–12 min | Makes: about 20
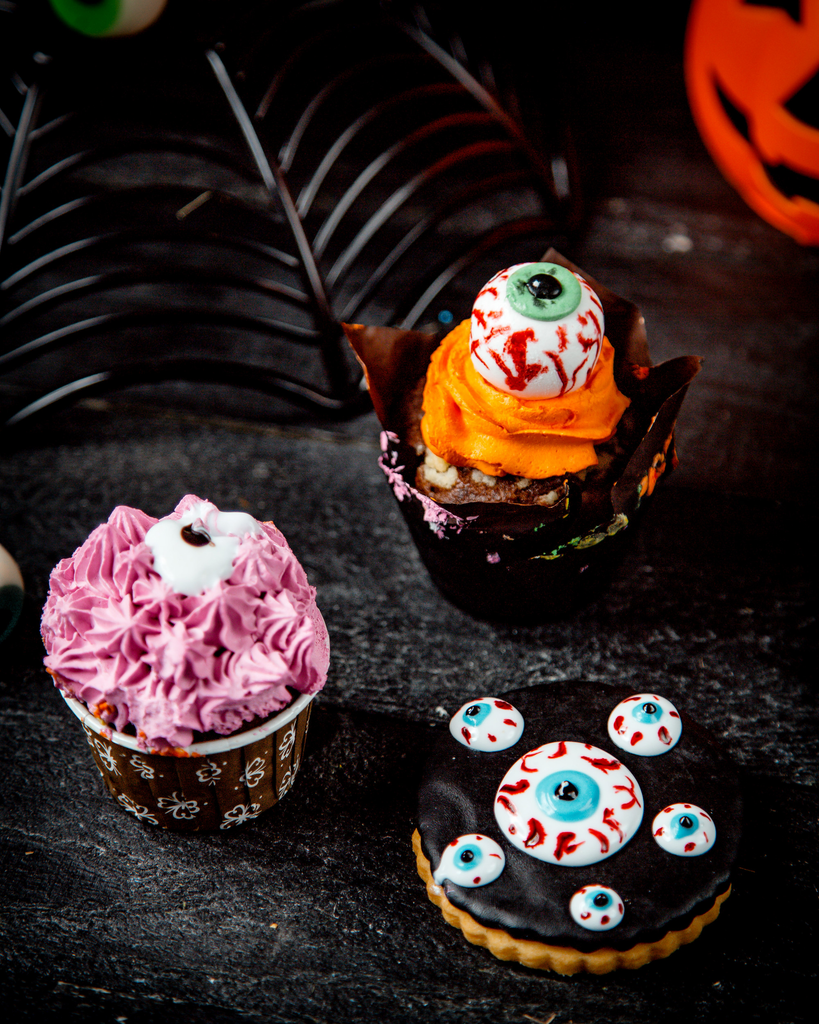
Brightly colored cookies topped with big, goofy candy eyes.
Why you’ll love it: Every monster ends up with its own personality.
Main ingredients:
- 1 package (about 16 oz) refrigerated sugar cookie dough
- Green or purple gel food coloring (about ½ teaspoon)
- Large candy eyes
- Frosting or melted chocolate to stick the eyes on
Steps:
- Knead the gel color into the softened dough until evenly tinted. Wear disposable gloves if you don’t want stained hands.
- Roll into balls (about 1½ tablespoons each) and place 2 inches apart on a parchment-lined tray.
- Bake according to the package, usually around 350°F for 10–12 minutes. Cool completely.
- Attach one big eye (or two or three small ones) to each cookie with a dab of frosting.
Tip: Mix different eye sizes and add a drawn-on mouth for extra character.
Tips for Perfect Halloween Cookies
- Chill your dough. Cold dough spreads less, so shapes keep their edges. Use softened butter, not melted.
- Cool completely before decorating. Warm cookies melt icing and chocolate.
- Measure flour carefully. Spoon it into the cup and level it off. Scooping straight from the bag packs in too much and makes cookies dry.
- Bake one tray at a time. Similar-sized cookies bake evenly, so you won’t end up with burnt edges and doughy centers.
- Bake with kids in mind. Make and chill the dough ahead, then let kids handle the decorating. Candy eyes and sprinkles are small, so supervise younger children and check labels for allergens.
Storage Instructions
Let cookies cool and any icing or chocolate set completely. Then store them in an airtight container at room temperature, with parchment paper between layers.
Most of these cookies stay fresh for about 3 to 5 days. Freshness depends on the ingredients and decorations, and cookies in warm or humid kitchens may not last as long. Keep soft chocolate chip cookies in a separate container from crisp cut-outs so they don’t change each other’s texture.
Frequently Asked Questions
Can I make Halloween cookies ahead of time?
Yes. Sugar cookie dough keeps in the fridge for up to 2 days. You can also bake the cookies a day or two early and decorate them shortly before serving.
Can I use store-bought cookie dough?
Yes. Recipes 4 and 10 are made with it. You can also use it for cut-out cookies, but it may spread more than homemade dough, so chill it well and keep shapes simple.
How do I decorate Halloween cookies without special tools?
A zip-top bag with a snipped corner works as a piping bag. A spoon, toothpick, or butter knife can spread icing and draw details. Sprinkles, candy eyes, and store-bought decorating gel finish things off.
Can I freeze Halloween cookies?
You can freeze baked cookies before decorating them, or freeze the raw dough, for up to 2–3 months. Let them thaw at room temperature while covered, then decorate. Freezing decorated cookies may cause the icing to become sticky or run, so decorating them after thawing gives the best results.
Final Thoughts
Whether you go for spooky spiders, silly monsters, or simple sprinkle cookies, these Halloween baking ideas are all about having fun. Pick a few favorites, bake a batch, and enjoy the treats. Happy Halloween baking!